Showing posts with label design. Show all posts

God Deserves Some Bling

Jean wrote:

I love working with metallic thread - it looks so elegant, so I've been playing with design elements for the narrow quilt corners and the rose window corners.


The silver and gold design (above) is the Trinity symbol. The rose is something I'm just testing - rose, rose window - get it? It's always wise to test a design on scrap fabric. That print is not really going into the quilt.


I just finished my second 500 yard spool of black thread. And started a third.

Hanging Out? Watch Out for Security!

Jean wrote:

Hopefully, the quilts will be installed this Saturday, the 22nd. While the rose window quilt will be attached to a wooden frame with velcro and the frame permanently attached to the wall, this is an unusual installation to say the least. Still, if it's 14-18 feet up the wall, it probably won't be taken down weekly (or even annually) for cleaning.

The standard way for a quilt to get "hung" is to hand sew a 4" wide open sleeve across the top, preferably down an inch or two from the very top. The picture here shows another quilt with a rod through the sleeve. The sleeve is sewn with a pleat at one edge so when mounted, the quilt will hang flat and not curl over the rod.

The size is standard for quilt shows, where the quilts are hung on wide wooden rods. The sleeve also protects the cloth of the quilt itself from stains or abrasion from the hanging rod.

In our installation, the two narrow lower quilts will have a standard sleeve, while the center larger quilt will have two sleeves with an opening between them to allow for the rod to be supported by a center support as well as at both sides. We did buy good, heavy ¾" rods, so they should not bend or bow with time.

Okay, what's this about security? Well, believe it or not, there are quilt thieves. Hard to believe, isn't it? But some quilts are like art pieces - not simply a bunch of fabric and thread, any more than a painting is a piece of paper or canvas and paint. Color, design and workmanship determine the value of quilts, as well as age for antique quilts.

There is an entire quilt appraisal industry out there. An expert appraisal is needed for any insurance value beyond the replacement value of the materials. Time doesn't count with routine insurance such as replacement house insurance or insurance when being shipped. Time only counts when it's part of an appraisal value.
People occasionally maliciously damage quilts. A few years back, a vendor at the International Quilt Festival in Houston, TX - one of the largest and most prestigious in the country - threw bleach at a quilt, which, needless to say, damaged it and the surrounding quilts quite a bit.

Why? He didn't like the naked woman portrayed on the quilt.

So what do quilters do about security? At one end is nothing - a completely anonymous quilt that says nothing about the quilt, the quilter or when or why it was created. At the opposite pole is the insertion of a grain-of-rice size microchip into the quilt, just like the ones inserted under the skin of pets in case they get lost. We haven't done that - yet - as it involves purchase, insertion and registration.

Labels are frequently attached to quilts and can contain a variety of information - the quilters' names, date of completion and perhaps the occasion. Labels should be sewn to the quilt and then quilted through to prevent unscrupulous people removing the label!

We chose two types of labels:
Embroidered Label
The stitched labels will be part of the quilt backings except for the larger rectangular quilt, which has a very artistic label done by Tracy on the front.

Ever wonder what St. Stephen is pointing to in the wood carving? Tracy has solved that mystery!


So our labels are integral parts of the quilts themselves, hard to remove but not as informative as the microchips. As each microchip costs $38, and I'm not sure if the registration costs anything, that may be a future security measure.

Just thought you'd want to know how we are trying to protect your investment.

I Only Make It Look Easy, Part One

Tracy wrote:

Okay, my last post mentioned the estimated number of hours I've spent at my sewing machine, just quilting and not sewing.

I am constantly amazed by the amount of time it takes me to quilt (actually, I'm amazed at the time it takes me to do pretty much anything at the sewing machine). I mean, it's sit down, sew one or maybe two squiggly lines and move on, right? Why, then, does it take me at least 45 minutes and usually over an hour to do one single block?

In an effort to document the how/what/when/where/why... well, that might be too ambitious, but let's try this, step by step.

First off, not even included in the at the sewing machine time, there's the three D's: determine-design-duplicate.

I start by looking for and assessing potential quilting motifs. This involves looking through my library at home - both in books and on my computer, checking out the city libraries, surfing the  web, and sitting down with pencil and paper (and a mega-eraser).

Once I find something that looks possible, I then have to figure out if it's quilt-able. Well, I guess everything's quiltable, but I'm hoping for the thing that will give the biggest bang for the buck (and create the fewest gray hairs while doing so).


F'r instance, this motif is quite cool, but it would drive me to drink. So many stops and starts and backtracks!

This one is also cool, and I can "walk the maze" in a continuous line. If you trace the motif with your fingertip on the screen, you'll find that this one will is made up of two continuous lines.

I've already accepted the sad fact that whatever I will be quilting will have crossed lines - the over/under weaving knot stuff (which I absolutely love) is not realistic for any more than a one-time thing*.

*Refer back to the gray hair and drinking comments*

Once I've got some 'possibles', then it's time to do some graphic manipulation. In the event that I've gotten a motif from an online source or from my computer, it just begins with opening the file. If it's from a book or a drawing, there will be scanning involved.

Once I open the file in my graphics program, I can then clean it up by removing stuff I don't want to use, or combining two different designs into one. After that, it's mucking around to make the motif into the correct size (1/2 inch smaller than the block size) and then printing. (that's 3 minutes, 3 seconds just to open and resize an existing, already-cleaned-up motif)

step 2


That's it for TWO of the D's: Determine and Design. Next up is Duplicate. And I'm still not at the sewing machine.

The Motif Search Begins

Tracy wrote:

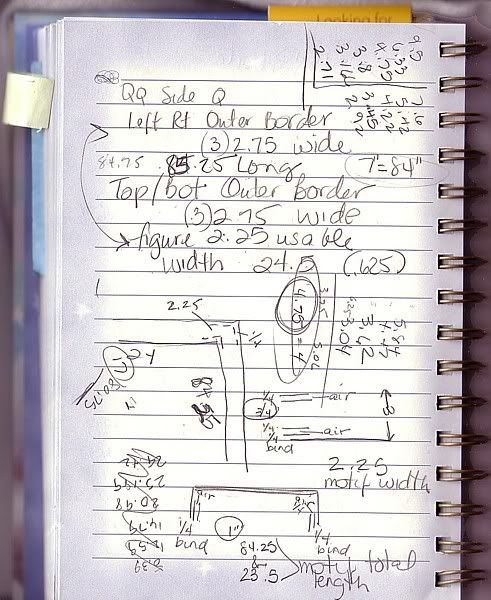
Okay, I got out the small panel and measured it.  From seam to raw edge, all 4 borders are 3".  Taking away 1/4" for binding and leaving 1/4" *air* on each side of a motif gives me a width of 2.25" with which to work.

Measuring horizontally, I get 24.5", raw-to-raw.

VERTICALLY, I get 85.25".  Is that right? I could have measured incorrectly (there aren't many uncluttered places that are 7' long or longer in my house).

Motif Math, part 1 Through some serious math-gymnastics, listening to Mr. Algebra spouting off just like HE hadn't slept through HIS classes, and a touch of pin-the-tail-on-the-fraction, I've come up with a projected motif size of 2.25 x 9.5".

Okay, true confession here:  The math-nastics actually led me to 2.25 x 4.75", but when I figured out that I was going to hand-draw FORTY motifs for just ONE of the SMALL quilts, I got inventive.  It was either that or a(nother) nap, and it was already 9:30 at night.
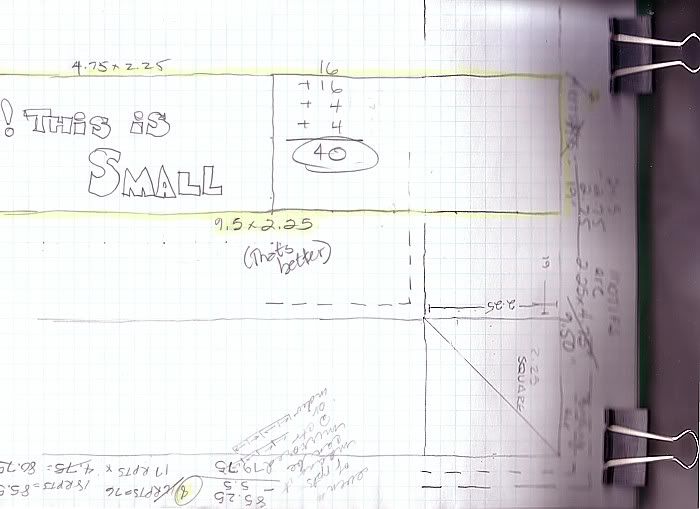
Don't bother trying to figure how my figurin' works out.  It's kinda like a secret ingredient.  Or magic.

Trust me.
Motif Math, Part 2


Next up, going through 5 or 10 inspiration books for... uh... inspiration.

Do you think that we should share the quilting theme?

The Drawing Board

Tracy wrote:

Okay, I had a brilliant inspiration for the quilting pattern for quilt borders. One or two readers even got a preview of said brilliant inspiration.

Oh, brilliant, brilliant, brilliant.

Until I put pencil to paper. After resizing (2.25 x 9.5") and the necessary simplification (so that a human could stitch the pattern) it was, well, boring. Boring and unrecognizable as anything even remotely resembling brilliant. Back to the drawing board.

Here's my drawing board:


Included are things that measure, things to help draw shapes, tracing paper, things that mark things, a major-league eraser-on-a-stick, and the Very Important Things: Coffee and a book on tape. It took 4 Miss Marple short stories to come up with a workable border motif (or two).

The Saint's New Clothes

All the time I've been working on Steve's ensemble, there's been a low-grade "Emperor's New Clothes" story perking in the back of my brain. Go figure.

Since we've decided not to reveal much more of Steve on the blog, I decided I'd give a
mind-numbingly-boring
blow-by-blow
of SOME of the ::gasp!:: handwork (yes, I believe I always DO gasp before doing handwork) that goes into making the Saint's New Clothes.

Before even touching the already-painted fabric, I trace a section of Steve (in this instance it's part of his cloak) onto a specially-treated tissue paper. No, it's not all that exotic (you do remember my fancy painting studio, don't you?) - it's the paper that the 'girls' put on the manicure table when you get fake nails. Waxed/plastic'd on one side, tissue-y on the other. Useful for a multitude of tasks, almost as important as Glad Wrap Press 'N Seal in my sewing arsenal.

Okay. Trace a section, roughly cut it out. Find the fabric, iron it (again), lay the tissue on the fabric and cut the fabric to the kinda-same-size-and-shape.

Find a clean but ancient piece of unbleached muslin. Iron it. Lay the muslin on the paper pattern and trace the outline with a blue or red chalk pencil.

Hey! Now the pictures start! Lay the drawn-upon muslin on the fabric, put obnoxiously-colored thread in the sewing machine (both top and bobbin) and sew along the chalk line with basting stitches.

I learned on this first one to break up the lengths of basting on long sections, to make it easier to remove the basting later. Of course I learned this the hard way, since this piece is the largest of all that are being "processed" this way.


Using, at times, two sticks and a fingernail (but always at least one stick), fold back the raw edge and press. Clip or notch as required.


Corners and tight spaces really require sticks, fingernails, steam and holding my mouth just right. (Occasionally I belted out a few notes from "God Bless America", but that was only when the iron collided with my skin.)

This picture shows making a little "edge" that's about 5 threads wide. It's a piddly thing and won't be identifiable from 20 feet away, but it does make a difference in the overall shape of the ... uh... shape.


Sheesh, did you actually get this far through the yawn-fest? The final piece, with all of the edges pressed under, ready to be pinned to the wall like a pretty butterfly.


Yeah. I did that. To all of the big and little pieces. Then I ::gasp!:: hand-basted all of the pieces of the puzzle together.

Inspiration and Collaboration

Jean  wrote:

The center quilt awaits Steve. His fans, or rather his kaleidoscopes are anxious to meet him.

It suddenly occurred to me, that beside Nadelstern's workshop, I was looking at the inspiration for the quilt everyday. It was my living room rug!


And while I work on the center quilt (waiting for Tracy to finish dressing Steve and finding a suitable background) and the rose window, the 2nd narrow quilt pieces comfortably wait their turn.


I was talking with my Woodland friends Saturday eve over dinner at Playa Azul in Kalama, and telling them what a joy it is to work in this collaboration with a person who truly collaborates. It's easy for two people to try to control all aspects of a project instead of just doing their part. What a pleasant experience!

Though it has been referred to in a number of posts, here's a picture of the Stargazer Fabric - before it was turned into Swiss cheese!

Precision Problem

Jean wrote:

Aaarrgh - You know how particular I am about measuring and remeasuring and cutting precisely and sewing accurately. Well, take a look at this picture. Does anything look wrong???


(Note from Tracy: What you're looking at is that the ends of the black don't reach the lines on the board, like the print fabric does.)

Gosh, didn't I measure the black length correctly? Pin it correctly? Sew it carefully? YES I DID!! The kona cotton shrinks! I couldn't figure out why the strips of fossil fern and white were "long" but the pink opulence and black kona were turning out "short."

Suddenly, it occurred to me. The black is shrinking. So I took a 2 x 7 1/4" black strip and sprayed and pressed it, and then remeasured. The strip was a hair over 7". That's almost a seam allowance short.

So I cut 3 strips the full width of fabric, cut off the selvedge edges and sprayed and pressed the strips. Then I cut some and use them to piece. Do you see any improvement?   NO!


So it should be fun piecing the lower quilt tops where there are so many kona black strips. See what you're missing?

A Precise Solution!

Jean wrote:


Aaaaahhhhh - Doesn't this look better?

How did this happen? I sprayed a long strip until it gurgled, and then lightly bounced the iron along the strip creating a good head of shrinking steam. Then I pressed the full width strip and cut strips to a slightly longer measurement. Then, repeated the spraying and pressing on each short strip, and finally cut to needed measurement. When sewn to the block, it's now the right size.

So, only 44 more strips to rip out and replace. Yeah, well, I should have stopped sooner, shouldn't I?

At least we have plenty of kona - to shrink.

More Progress and Division of Labor

Jean wrote:

Okay, you won't feel too bad after you quilt them all!

Here's a couple of pics so you can see how things are laying out together.

The newest strip is stargazer blocks with leading.

Making the Kaleidoscope Blocks

Jean wrote:
This is a sample of the Madame Butterfly Opulence fabric that will be used for the center blocks of the lower quilt. Although somewhat dark, it will be set off with the narrow white inserts between it and the Stargazer fabric.


Templates for the Opulence and Stargazer fabrics are cut to size needed for a particular block and then placed randomly on the fabric.


Using a black, narrow tip permanent pen, features of the fabric are copied onto the plastic template.  Then lines are drawn on the fabric around the template.  The fabric is cut out on these lines, leaving a swiss cheese hole in the fabric. The template is then moved to an identical location on another motif and another square piece is marked, matching the hints on the template.

After cutting 4 squares, the template is turned over with the front side down, and the process is repeated for four more squares.

Each set of squares are cut diagonally (one set from right to left, and the reverse set from left to right).

The halves are then matched and sewn to create a unique block.

If you think this is a bit ridiculous, don't blame us.  This is a wondrous idea from Paula Nadelstern, a renowned New York quilter who designed the Opulence fabric and many award winning quilts using this kaleidoscopic technique.

Another Element!

Jean wrote:

Stargazer KaleidoscopesWhile it's snowing beautifully, I tried cutting out some squares from the Stargazer fabric.  

First I had to figure out the template size.  These half square examples, for the narrow quilts (blocks S), are really pretty.  They are just the wrong size.  They are okay for the length but 1/4" shy for the width.  

I've got the formula straight now.  Here it is:

finished block size + 1 3/4" divided by 2 = template size

Here's the new fabric.  It shows lighter than we thought it would which is great.  

St. Stephen inspiration

Tracy wrote:

The line photo...


Click for larger view...the line drawing.

The drawing has since been altered a bit, mainly because one or more of the participants in this project knows a little about human anatomy.

heh.

Designing Woman

Jean wrote:


Here are the designs for the rose window and lower quilts as seen on my computer.  The Corel Draw designs are saved as Encapsulated Postscript files (*.eps), sent by email to the printer in Longview, and then picked up as full size printouts.


Only half of the lower large quilt is shown as the printer as a width limit of 36" and the quilt is 6' wide.  The rose window has been divided into 2 parts because I need the actual pattern to make templates for each individual piece.

Here are the templates made from the full size pattern printout.  The fabric will be cut so the edges butt tightly under the bias tape leading.  Some trimming and adjusting is needed as the full size pattern is not perfect (only God is!).